Understanding the Value of Appliance Repair
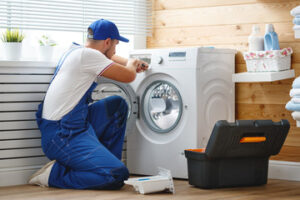
Appliance Repair Naperville professionals are certified and trained to perform repairs on various appliances. They receive extensive training in electrical systems, circuitry, and specific appliance models.
Ask if the appliance repair service offers a warranty on their work. It is also a good idea to check their certifications and years of experience.
Appliances play a pivotal role in our lives, and keeping them working properly requires expert service. Appliance repair is a complex process, involving numerous interconnected components that must be carefully inspected and maintained. It also involves addressing a range of issues, from electrical to mechanical. These problems may be difficult to diagnose and require the expertise of a trained technician to resolve.
While DIY repair attempts can offer some benefits, professional repairs should be considered when it’s clear that the issue is too complicated for homeowners to handle. The first step in deciding whether to tackle a repair yourself or hire a professional is evaluating your comfort level with technical steps, such as handling electrical components or using specialized tools. In addition, homeowners should consider their ability to assess safety risks and determine when they should leave a task to professionals.
A licensed technician will have access to a wide variety of tools, diagnostic equipment, and parts that aren’t readily available to homeowners. This enables them to diagnose and fix complex issues more quickly and efficiently. Professionals will also know how to safely disassemble and reassemble appliances without damaging their interiors and can access hard-to-reach areas for more accurate repairs.
Another advantage of professional repair services is their commitment to quality work. Licensed technicians are often required to adhere to certain standards and practices, including regular training and certification. As a result, they’re able to provide consistent and reliable results. Furthermore, many repair services will offer a warranty on their work to reassure customers of their reliability and quality.
Lastly, it’s important to note that some appliance manufacturers require that all repairs be performed by qualified professionals in order to maintain their warranty coverage. Attempting to perform DIY repairs or hiring unlicensed technicians can void these warranties, leaving you responsible for any further damage or expense that occurs as a result of the improper repair.
Overall, while it can be tempting to save money by attempting DIY appliance repairs, it’s important for homeowners to recognize their limitations and hire professionals when necessary. In addition to avoiding potentially costly mistakes, professional appliance repairs can save you time and stress by allowing you to schedule repairs around your busy life.
Safety
Appliances play a critical role in our daily lives, from cooking and laundry to heating and cooling. As such, they’re often prone to wear and tear from regular use or accidents. To prevent these problems from escalating, routine maintenance and professional repairs are essential. Accurate repairs help appliances function optimally, extending their lifespan and minimizing the risk of sudden breakdowns.
Professional appliance repair technicians adhere to rigorous standards to ensure quality and safety throughout the repair process. This includes following industry regulations and upholding ethical considerations such as transparency in pricing and warranty information. They also take precautions to protect themselves from hazardous materials and sharp objects. For example, if an appliance requires the use of refrigerants, they’ll wear a face mask to avoid inhaling these chemicals.
Moreover, they use specialized tools and equipment to inspect and diagnose appliance issues. This minimizes downtime and saves customers time, money, and stress. Many appliance repair services offer flexible scheduling to accommodate busy schedules and emergency calls. Some even employ service business software to manage appointments and dispatch technicians in a geographical area.
Appliance repair technicians receive training in the fundamentals of electrical systems, appliance components, and repair methods through vocational or technical schools. These programs last anywhere from six months to two years and involve both theoretical and practical coursework. Aspiring technicians can also take online courses and self-study in their spare time to acquire the necessary knowledge.
Before attempting any home appliance repairs, it’s important to familiarize yourself with your equipment’s inner workings and safety precautions. You should also study the appliance’s user manual to learn about its maintenance requirements and warnings. Ignoring these guidelines could compromise your safety and void any warranties or insurance coverage.
When performing DIY appliance repairs, you should always unplug the device before working on it. This prevents the risk of electric shock and ensures longevity throughout the repair process. Additionally, you should switch off the house circuit breaker to disconnect electrical power for hardwired appliances. It’s also recommended that you wear gloves, a dust mask, and rubber-soled shoes to avoid exposure to dangerous chemicals or particles.
Genuine Replacement Parts
Choosing genuine replacement parts is a key consideration for appliance and HVAC repair, enhancing the longevity of your appliances and systems. Many homeowners and professionals alike may be tempted to opt for generic substitutes, but these non-authentic components can have detrimental effects on the performance, safety, and warranty coverage of your appliances.
Authentic OEM components are designed to match the exact specifications and materials of your appliances and HVAC systems, ensuring optimal compatibility and performance. While these components often cost more upfront than their aftermarket counterparts, the long-term savings that come with avoided repairs, maintained efficiency, and streamlined repair processes can easily outweigh initial costs.
When you choose genuine replacement parts from a trusted and reliable supplier, such as All Brand Appliance Parts, you can be confident in the quality and reliability of your appliance repair. Each piece is carefully inspected and tested to ensure the highest standards of quality and durability, with every order backed by a comprehensive warranty.
Why Do Appliance Replacement Parts Cost So Much?
Genuine parts are expensive to produce, requiring precision materials and rigorous testing to comply with strict safety regulations. In addition, the large inventory of appliance parts requires substantial building space and an effective system to store, track, and locate each part. While non-genuine or third-party replacement parts can be cheaper, they lack the quality assurance and compatibility standards upheld by OEM components and may introduce unforeseen problems.
Generic substitutes for appliance parts can compromise functionality and efficiency, leading to premature breakdown and higher energy consumption. They may also fail to adhere to the manufacturer’s specifications for installation, resulting in damage or other hazards. Using generic parts can invalidate your warranties and insurance plans, making them unenforceable in the event of a product malfunction or injury.
Opting for genuine replacement parts can protect your appliances, HVAC systems, and outdoor power equipment. Many manufacturers stipulate the use of genuine parts for repair to maintain warranty coverage, and they offer an array of benefits that can greatly enhance your home’s comfort, safety, and energy efficiency.
Warranty
Most appliances come with a manufacturer’s warranty that lasts for a certain period of time after purchase and covers the cost of repairing or replacing defective or malfunctioning parts. Many manufacturers also offer extended warranties or protection plans that increase the length of coverage and add additional repair and replacement options.
If your appliance develops a problem during the warranty period, contact the manufacturer’s customer service or authorized service center to report the issue. They will instruct you on the next steps. Be sure to follow the warranty guidelines and provide as much detailed information about the problem as possible to help speed up the process. Keep your purchase receipt and warranty documentation handy to provide proof of purchase and verify the coverage period.
The manufacturer will typically send a repair technician or direct you to an authorized service center to inspect and repair the appliance. If the issue is covered under warranty, they will fix or replace the appliance or components at no charge to you. They may use new or refurbished components depending on their policies. Be aware that some manufacturers have restrictions or limitations on their warranties, such as cosmetic damage or consumable items like filters, light bulbs and batteries. Check your appliance manual and online resources to determine what issues are covered by the warranty.
Be sure to work closely with the manufacturer and approved repair technicians throughout the repair process. Disregarding instructions or attempting to make repairs or modifications that are not authorized can void your warranty and leave you responsible for the costs of any subsequent repairs.
Before deciding to repair or replace an appliance, consider the overall reliability of the brand and its track record of quality. If your appliance is older or has a high risk of breakdown, it might be more cost effective to upgrade to a newer model.
How to Prevent Landscape Lighting Repair
Landscape lighting can add a whole new dimension to your home’s exterior. But, like any system it requires regular maintenance and sometimes repairs.

Landscape lights are exposed to sun, wind, and moisture on a daily basis. Unless they are high-quality, the components can decay due to these conditions. This can lead to short circuits, tripped breakers and even fire. For professional help, contact Landscape Lighting Repair Orlando.
Lighting fixtures are an integral part of a landscape lighting system and provide a beautiful aesthetic to the property at night. Unfortunately, as the lighting ages, the fixtures can break and become damaged. The good news is that there are some things you can do to prevent your landscape lights from breaking, such as ensuring the transformer has adequate wattage and checking for water damage.
Depending on your location, the type of landscape lighting and the materials used to build it, some fixtures are more durable than others. Typically, high-quality outdoor lighting uses copper or brass and will last longer than less expensive plastic or aluminum. However, it is important to check the fixtures regularly for any signs of wear and tear.
Fixture problems can range from minor issues such as a broken ground stake to an inoperable bulb or fixture with a bad wire connection. In some cases, the wiring may need to be replaced. In these situations, it is best to have a professional examine the wiring and connections to ensure they are safe and up to code.
Low voltage landscape lighting can be tricky because the cables are buried underground or in mulch. The wires are constantly exposed to the elements and can be subject to corrosion. To prevent this, Nite Time Decor recommends using a copper wire that is designed for landscape lighting or burying the cable in a garden bed where it will not be prone to corrosion.
Another common problem is overcrowding of plants or trees. When this happens, the landscape lighting becomes blocked by overgrown bushes and trees. In these instances, the homeowner should prune the plant or tree to open up the space for the light. This will also help the light to shine brighter.
It is important to check the wattage of your landscape lights regularly. Too much wattage can cause the breaker to trip and prevent your lights from turning on. To check for this, you can use a voltmeter to measure the current on the transformer. The total wattage of your lighting should be less than 80% of the transformer’s capacity.
Wiring
Landscape lighting is a great way to transform the exterior of your home. However, this kind of system can run into problems over time. In order to prevent this from happening, homeowners need to work with a landscape lighting professional to ensure that their system is designed and built correctly. This will help to ensure that the lights are able to work properly, without experiencing any problems.
When it comes to fixing problems in a lighting system, the first thing that you will need to check is the wiring. If you have noticed that your lights are constantly tripping, then this is a sign of a problem with the wiring. In this case, it may be necessary to replace the wires in your lighting system. This is a job that is best left to professionals, as the right type of electrical wiring can be important for your landscape lighting system’s safety and performance.
Another possibility is that there is a problem with the socket itself. The two prongs inside of a fixture’s socket can come into contact with each other and cause a short, which will trip your entire landscape lighting system. If you notice any heat or smoke coming from a socket, it is best to turn off the power and call a landscape lighting repair specialist right away.
In addition to examining the wiring, you will also need to look at the connections where your lights connect to the transformer. It is very common for the splices in landscape lighting to become loose. This can be caused by a variety of factors, including dirt, rainwater, and temperature fluctuations. It is best to use a connector that is waterproof and resistant to oxidation.
It is also a good idea to examine the splices where your lighting system connects to underground utilities. It is very easy for people to unintentionally dig into a water, sewer, or electrical line while working on landscaping. It is a good idea to call 811 before you dig, and request that they mark the approximate location of any buried lines with paint or flags.
Bulbs
Landscape lighting is one of the best ways to transform your home’s curb appeal, and it adds valuable functional value at night by illuminating pathways and gardens. However, it’s not without its challenges. There are a few common issues that homeowners experience with their landscape lighting, and some simple fixes can keep your system running smoothly.
When one or more of your lights isn’t working, it may be time to replace the light bulb. In most cases, this is the quickest and most inexpensive fix. However, if you find that the new bulb doesn’t work, it could be a sign of a bigger issue like a bad socket or faulty wiring. In this case, it’s a good idea to contact an electrician for help.
LED bulbs have become the standard in outdoor landscape lighting because of their energy efficiency and long lifespans. These bulbs produce a brighter illumination than traditional incandescent bulbs and don’t require large fixtures to bounce the light around the yard. They also last tens of thousands of hours, saving you money on replacements and minimizing your environmental footprint.
Many people have trouble choosing the right light temperature for their landscape lighting. Some prefer warm colors, while others like cool colors that accentuate foliage or architectural features. It’s important to choose a bulb with the appropriate color temperature for your landscape lighting system, and you can experiment with different temperatures to see which ones best suit your needs.
If you have multiple paths lit with path lights, it’s important to consider how the design of your space can affect their performance. Having your path lights too close to cars and doors may result in the lenses breaking from being hit by opening or closing car doors. Additionally, if your path lights are near areas where children play, they can break if the kids accidentally kick them.
Another common problem with landscape lighting is moisture. This can be caused by a leaky fixture or simply by water getting into the electrical components. Leaky fixtures can be hard to diagnose and can lead to a variety of problems, but the easiest way to prevent moisture damage is by installing a fixture that is waterproof.
Timer
A landscape lighting timer controls when the lights turn on and off. It can be programmed to run your lights on a daily schedule or a weekly schedule. Timers are a great option for homeowners who want to save energy, prevent unauthorized use, and extend the lifespan of their bulbs. However, if your landscape lights are not turning on or staying on at the appropriate time, you may have a problem with the timer itself.
Several things can cause your low voltage landscape lighting timer to fail. Often, this is due to an issue with the battery backup that keeps track of timer programming. It may also be caused by a power loss, which can disrupt your lighting schedule. If this is the case, replace the batteries and reset your timing settings.
You can also use a voltmeter to check that your transformer is receiving the proper amount of current. The meter can tell you whether the wiring is good, the transformer is working properly, and whether it is feeding your lights the correct voltage. The voltmeter can also help you find the source of the problem.
Another common issue is that your landscape lights are running constantly or at the wrong times. This is most likely caused by an improper setting on your timer. A voltmeter can be used to check the timer and ensure that it is set correctly. You can also try reprogramming the timer to fix this problem.
There are various types of timers available for landscape lights, each with its own benefits and advantages. Mechanical timers are simple and affordable, while digital timers offer more customization options. Smart timers are the most advanced, allowing you to control your landscape lights from an app on your smartphone. This type of timer offers convenience, flexibility, and potential integration with other home automation systems. However, these types of timers can be more expensive and require some level of technical knowledge to install and troubleshoot. In addition, they can be vulnerable to weather and other environmental issues.
How Plumbers Fix Leaky Faucets
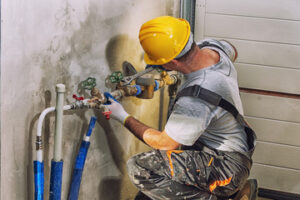
Plumbers In Spring TX install and repair systems that facilitate water supply, waste disposal, and drainage in residential and commercial settings. They interpret blueprints and building codes to lay out piping and connect fixtures and appliances.
Plumbers also need strong customer service skills to listen to their clients’ concerns and explain technical issues in ways that everyone can understand. There are several paths to becoming a plumber, including vocational school, apprenticeship, and on-the-job training.
Just one drip per second from a leaky faucet can waste more than 3,000 gallons of water each year. That’s why it’s important to fix a leaky faucet as soon as you notice it. Fortunately, replacing the washer or O-ring usually solves the problem. This is a simple job that any homeowner can do with a few tools and materials. It also saves money on your water bill!
Before beginning your repair, turn off the water supply to the faucet. Look for shutoff valves underneath the sink, or in your home’s basement or garage. If you can’t find them, turn off the main water supply to your home. Then, using a screwdriver and wrench, remove the decorative cap at the top of each handle. This exposes the screw underneath, which you can then unscrew. The handle should then come off easily. You may need to jiggle it or use a handle puller if it’s stuck. Be careful not to bang the handle, which could break it or cause a leak elsewhere in the system.
Next, you’ll need to identify the type of faucet you have. This will help you determine the best way to replace the washer or O-ring. Different types of faucets have different parts, so it’s important to have the correct replacements on hand. For example, a ball-type faucet might require a specific washer or O-ring that fits snugly and securely in the valve seat. If you’re unsure of the type of faucet you have, consult your owner’s manual or ask an expert at a hardware store.
Plumbers often troubleshoot and diagnose plumbing problems, including dripping faucets. They can tighten loose parts and restore leaking ones to ensure that the seals provide a watertight fit. They can also install or replace water filters to ensure that your drinking water is clean and healthy.
Although some homeowners may try to fix a leaking faucet by themselves, it’s important to hire a professional plumber for larger jobs and complex installations. Plumbers are trained to understand the complexities of installing and maintaining plumbing systems in commercial and residential buildings. They also know how to read and interpret blueprints and can ensure that all parts are up to code. They can even help you choose the best type of plumbing fixtures for your home or business.
Replacing a Faucet Handle
Changing out your faucet handles is a simple and inexpensive way to make a big difference in the appearance of your bathroom. You can find handle sets to match any decor, from modern minimalist designs to traditional country styles. To install new handles, shut off the water supply, remove the old handle screws and escutcheon plates, and carefully remove and screw on your replacements. You’ll need the right tools for this project, including a pair of small wrenches and pliers, a Phillips head screwdriver, an Allen key, and possibly a pipe wrench or tongue-and-groove pliers.
Before you begin, turn off the water to prevent a sudden flood. Having the right materials on hand will save time and frustration during this project. You’ll also want to keep a towel or rag nearby to catch any drips and spills.
If your faucet is leaking, it may be due to mineral build-up that’s narrowing the opening through which clean water flows. Alternatively, the leak could be caused by a loose valve stem or cartridge. Using penetrating oil and gently tapping the faucet with a rubber mallet can help lubricate the valve stem and loosen the stubborn handle screw.
Stuck faucet handles are more common than you might think. They’re often the result of a small amount of trapped water inside of the handle that builds up over time, creating friction between the handle and the metal faucet body. This can cause the handle to become stuck and difficult to turn. Fortunately, the problem is usually fixable with a little patience and effort.
You’ll need to locate the screw that holds the handle in place and remove it. In some cases, this will be a standard screw with a Phillips head, while others will use a setscrew or hex (Allen) wrench. Once the handle screw is removed, the handle can be pulled straight off of the base plate, revealing the cartridge and faucet stem underneath.
If the faucet cartridge is worn or damaged, you’ll need to replace it. Fortunately, this is a fairly easy process that requires minimal tools. First, you’ll need to identify the type of faucet you have so that you can buy the correct replacement. Once you have the new cartridge in place, you can screw on the faucet body and reattach the handle.
Replacing a Faucet Cylinder
Cartridge faucets have a unique design that makes them easy to replace when they begin to leak. To replace a cartridge, shut off the water and drain the fixture. Remove the handle, taking care not to lose any small parts. Locate and remove the set screw, often hidden under a hot/cold index button or decorative cap, if there is one. Next, loosen and remove the handle screw with a Phillips head screwdriver or Allen wrench. Pull straight up on the handle to remove it from the escutcheon. Now you can access the cartridge retaining nut. Loosen it with a pipe wrench or tongue-and-groove pliers, and remove the cartridge. The cartridge may be full of hard water deposits, or it could simply be worn out from years of use.
After removing the old cartridge, install the new one, making sure to match the model number. Replace the escutcheon and screw the handle back on. Before reassembling the faucet, rub the O-rings with plumber’s grease to make them easier to insert and seal. If your cartridge is new, it will come with new O-rings; otherwise, get some from your hardware store. Now you can turn the water on to test your work!
A career as a plumber requires special skills, including attention to detail and the ability to troubleshoot. You also need to be able to listen to customers and understand their problems. Plumbers often work evenings and weekends, so they must have flexible schedules to accommodate their clients’ needs. Moreover, plumbing is a trade that constantly changes and updates, so you must be willing to keep learning to stay current on techniques and equipment. As a result, plumbing can be a challenging career to pursue, but it’s also incredibly rewarding and satisfying. If you’re interested in becoming a plumber, start by earning your vocational training through an apprenticeship or college degree program. Then, obtain a license by passing an exam in your state or municipality. With dedication and determination, you can achieve your dream of becoming a plumber! Contact us at PlumbersStock for more information on getting started in this exciting profession.
Replacing a Faucet Valve
Whether they’re installing new faucets or repairing old ones, plumbers must be able to think on their feet. They must understand how different materials and systems work in order to troubleshoot problems and make repairs effectively. They also need to be creative when it comes to solving plumbing issues, as not all problems can be fixed with standard parts.
Plumbing is a trade that requires extensive education and training. Most plumbers get their start through an apprenticeship, which combines classroom instruction with paid on-the-job training. In addition, many states require plumbers to pass a certification exam before they can work independently. This ensures that plumbers have a good understanding of plumbing codes and regulations.
Some of the main responsibilities of plumbers include inspecting existing pipe work and testing water pressure levels; identifying leaks or blockages; fitting replacement parts such as valves or taps; connecting waste disposal units to drainage systems; power-flushing drain lines; replacing broken sealants around baths and sinks; and repairing or replacing toilets and other appliances. Plumbers may also need to do some heavy lifting and work in tight spaces.
The most common residential plumbing problems are related to sinks, tubs and drains. For example, a leaky faucet or an overflowing bathtub can easily become a major problem if not dealt with quickly. Fortunately, there are some easy fixes for these issues that can help homeowners save money and avoid costly repairs.
A faulty valve seat can cause a faucet to drip or stop working altogether. In most cases, this can be fixed by replacing the old seat with a new one. A new seat will ensure that the stem or cartridge is firmly seated, which will prevent it from leaking. It’s important to choose a seat that is an exact match with the original so that it can be installed in the same way as the old one.
Generally, to replace a faucet valve, you will first need to shut off the water supply by turning the valve clockwise until it’s completely off. Then, you can remove the handle and screw off the decorative cap that conceals a setscrew underneath. You can find a new cartridge at your local hardware or home center, and you should also pick up some plumber’s grease to coat the O-rings in the handle base when you install it.
Why Epoxy Flooring is a Game-Changer for Homes and Businesses
Epoxy flooring provides one of the highest levels of durability. It’s a great option for commercial and industrial floors that see heavy foot and vehicle traffic.

It’s resistant to chemical spills and cleaners and is easy to sanitize. This makes it ideal for locker rooms, auto showrooms and veterinarian clinics.
Epoxy flooring is among the most durable flooring solutions on the market. It offers seamless protection for concrete floors and stands up to a lot more wear and tear than other flooring materials, such as tile or vinyl. It is an especially great choice for industrial environments with heavy machinery and chemical spills.
Proper installation plays a major role in epoxy’s longevity and durability. Floors that are cleaned regularly and undergo periodic maintenance tasks like recoating when needed tend to last longer. Surface preparation is also critical – a concrete base that is not properly cleaned or prepared can cause problems later on. It must be free of any oils, solvents, dust, and debris before the epoxy is applied. Mechanical surface preparation equipment is often used, including media blasting and diamond grinding, to create a rough profile for optimal adhesion.
Another factor in an epoxy’s longevity is its resistance to chemicals and stains. This can vary depending on the specific epoxy formulation, thickness, and exposure to varying conditions, so it is important to speak with a specialist before choosing an epoxy solution for your project.
Epoxy floors also resist water damage, which is a huge benefit in any commercial or industrial setting that may experience flooding or water spills. This prevents the toxins from seeping into the flooring and spreading throughout the space, saving money on repairs and cleanup.
Finally, epoxy is highly customizable and available in a variety of colors, finishes, and styles. This allows you to achieve a unique and visually appealing look in your facility, whether you want to bring a sense of warmth or modernism to your space. Unique metallic pigments can even be added to the epoxy to create an effect that is not possible with regular paint.
Low Maintenance
Epoxy isn’t prone to stains or other damage from spills, dirt, bacteria and moisture like other flooring surfaces. Instead, it resists them all and needs only a little routine care to stay looking pristine. Regular sweeping and occasional mopping are usually all that’s required.
This is because epoxy creates an impenetrable non-porous seal over the floor, which makes it waterproof. This is an important benefit for any space that may be prone to water leaks or flooding, including areas of heavy foot and machinery traffic. It is also a valuable safety measure for any space that can suffer from oil or chemical spills – the toxins won’t be absorbed into the floor and cause a hazardous condition.
In addition, epoxy is an anti-slip surface that prevents people and equipment from skidding on the floor. This safety feature can be further enhanced by adding sand, gravel, polymer grit or aluminum oxide to the epoxy coating. The smooth, reflective surface of an epoxy floor will also help to brighten the room in which it’s installed. This is a great benefit for any business, especially one that must keep its doors open for customer access and/or a high amount of foot or machinery traffic.
It is important to note, however, that epoxy will absorb some chemicals that can damage the floor if they are allowed to sit on it for too long. For example, it’s a good idea to wipe up spilled antifreeze or oil with shop towels before the liquid has a chance to evaporate into the air. The same goes for paint, household cleaners and other abrasive chemicals.
Finally, it’s a good idea to place a rubber-backed mat in front of any cars parked on the epoxy floor, as this will protect the flooring from battery acid and other automotive fluids. This is especially important if the vehicles in question are a motorcycle or golf cart, as these will be exposed to much more powerful and dangerous chemical spills than standard passenger cars.
The key to a successful epoxy floor is proper surface preparation, which should always be completed by a team of specialists with the appropriate equipment and knowledge. It’s vital to make sure the concrete is thoroughly cleaned, repaired and profiled, as well as de-greased if necessary. Failure to do so will result in a low-quality finish, shortened lifespan and costly repairs.
Easy to Clean
Achieving the shiny, pristine look of epoxy floors requires minimal maintenance. The simple tasks of sweeping and mopping keep dust, dirt, and other debris from accumulating and dulling the finish. Choosing the right cleaning products and implementing a regular routine will ensure that your floor maintains its attractive, glossy sheen with minimum effort and expense.
For a simple and effective cleaning solution, diluted ammonia is the way to go. Fill a bucket with water, then add 3-5 ounces of the cleaning agent. Mix well and apply to your floor, moping thoroughly and paying special attention to high traffic areas. Rinse with hot water to remove any residual cleaning product and to wash your floor completely clean. Then, dry with a squeegee or a towel. For a deeper and more thorough cleaning, you can use a scrub pad or mechanized floor scrubber. Just remember that you must not use any abrasive pads or chemical cleaners, as these will scratch or degrade the finish and damage your floor.
In addition to regular mowing and sweeping, you should also promptly remove any spills. This prevents staining and ensures that the substance is washed away completely before it can cause long-term damage to your floor.
Other ways to extend the life of your floor include avoiding any sharp objects that could scratch or dent it. You should also place mats or plywood in heavy traffic areas to protect the finish and reduce the risk of damage from equipment and other tools. If you have a welding or grinding area in your garage, you should also consider using a welding mat to protect the surface from dents and scratches.
A well-maintained floor is not only easy on the eyes, but it is easier to work on and will last longer than a neglected one. If you are considering a new flooring option for your commercial, industrial or residential garage, then epoxy is definitely worth considering as a durable and visually appealing choice. Just make sure to have it properly installed by a professional, and don’t forget to care for your floor regularly to extend its lifespan.
Aesthetically Pleasing
Epoxy flooring is often used in commercial buildings and industrial facilities, but it can be an attractive addition to a home as well. Its glossy finish reflects lighting throughout the room, making it brighter and more spacious. The coating is available in a variety of colors and textures, and it can be customized with patterns or logos to match your decor.
It is also water-resistant, so it can withstand heavy foot traffic and chemical spills without any damage. If you have epoxy floors in a garage, it’s important to use the right chemicals for cleaning so that they are safe for your tools and vehicles. This helps to prevent damage and keeps your floor looking great.
Another benefit of epoxy flooring is that it is easy to sanitize. This is particularly beneficial for warehouses and factories, as it can help prevent the spread of germs. This can save you money in the long run by avoiding the need to replace your flooring more frequently, which can be expensive.
Unlike other types of flooring, epoxy can be installed directly over the existing surface. This can reduce installation costs and eliminate the need to spend time and energy on restoration errands like waxing or steam cleaning. Its resistance to cracking, staining, fading and abrasion makes it one of the most cost-effective flooring options available.
Another advantage of epoxy is that it can be made slip-resistant by using a grit additive. This is a useful feature for areas that experience frequent wet weather or are subject to spilled substances. It can also help to keep your employees and visitors safe from injury.